Workshops
To participate in a group activity, such as a simulation or a game, your users join a workshop.
Workshops are identified to users by the name of the organization running the workshop and an event name. You must add users to a workshop to allow them to participate in a simulation.
Workshops are only available in team projects.
Workshops are implemented in the JS libraries as groups.
Let's talk about how you create and manage workshops.
Access your workshops
- Open a project.
- On the left, click Workshops.
Create workshops
To create a workshop:
- Go to the Workshops page.

- Click Create Workshop.

- Enter the name of the organization hosting the workshop, which is not necessarily the same as the organization that owns the Epicenter account.
- Enter the name of the event that the workshop is created for.
- Expand More options to set optional parameters if needed.
- Click Create Workshop.
Now, you can add users to the workshop.
The workshop name is generated automatically. If necessary, you can edit the Workshop Name field. This is an internal identifier and should be unique.
It's a good idea to make the event name descriptive to give users a sense of what the event is about.
Optional parameters
Under More options, you can set these additional parameters for the workshop:
- A limit to the number of participants
- A limit to the number of runs a user can participate in during the workshop.
- The day when the workshop results should be permanently deleted.

Update workshops
To update a workshop:
- Open the Workshops page.
- Find the workshop in the table.
- Click the organization name, the event name, or the workshop ID.
Add users
Before you add users, check or update the password complexity rules for your organization.
If you need to add your Epicenter admins to workshops as users, you must enable username duplication in organization settings.
To add users, create a new workshop, or open an existing one from the Workshops page. The User Details page opens.

Here you have the following options for adding users.
One at a time
- Click Add User.
- Enter a user name.
- Click Continue.
- Enter the user details.

- Be sure to select the user type: Participant or Facilitator.
- Click Add User.
Import from a spreadsheet
- On the User Details page, click Import From Spreadsheet.
- If you don't have a user spreadsheet, click Download Template above the dashed-line box.
- Click Click to browse or drag and drop a spreadsheet file in the box.

- Be sure to select the user type for each user: Participant or Facilitator.
- Click Add Users to Workshop.
Existing users
If your spreadsheet contains an existing username, the record is treated as an existing user. You can update their details or keep the original.
For example, if your spreadsheet contains an existing username with a new password and last name:
- Choose Use New: The user is added to the workshop, and the password and last name are updated.
- Choose Keep Previous: The user is added to the workshop, but the old password and last name remain.

Once all the changes have been reviewed, be sure to click Add Users to Workshop to complete the upload.
Errors in spreadsheet
If the user details contain errors, you are prompted to fix them.

- Edit the field(s) that require correction.
- Click Try Again.
- If all looks good, click Add Users to Workshop.
Invite by email
To send an invitation to participate in a workshop:
- Click Invite by Email.
- Enter the email address and the user's first and last names.

- Click Invite User by Email.
Accepting an invitation
The invited user receives an email with a link to confirm the email address and complete the registration.
- Click the confirmation link in the email.

- Create a password.
- Click Complete Registration.
- On the confirmation page, click the project link to get started.
Allow self-registration
To allow users to register themselves by following a link:
- Click Configure Self-Registration.
- Under Self-Registration is Enabled, select Yes. The form expands.

- Select a pre-approval requirement option.
- To invite users to self-register, send them the link displayed under Self-Registration URL.
- Click Save.
You can always access the self-registration URL again by clicking Configure Self-Registration on the workshop's User Details page.
Registering for a workshop
When you follow the self-registration link:
- Enter your email address.

- Click Send Email Message.
- Follow the confirmation link in the email.
- Fill out the registration form.

- Click Complete Registration.
- Click the project link to access the workshop you have been invited to.

Assign users to roles
In a multiplayer project, users must be assigned to roles.
You can assign user roles for the entire duration of the workshop. Alternatively, you can save a set of role assignments as a run configuration.
To edit multiplayer role assignments:
- Open a workshop.
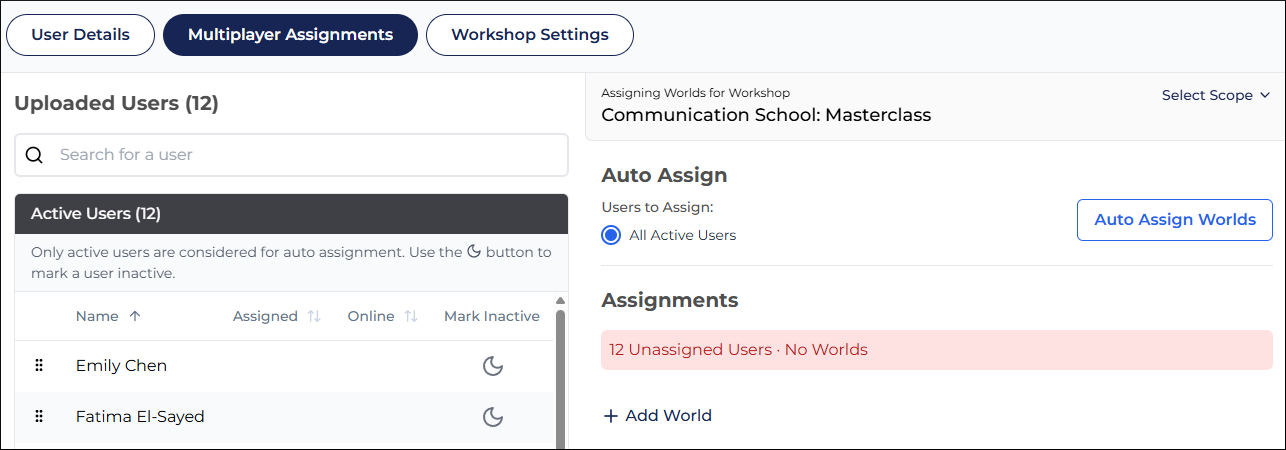
- Click Multiplayer Assignments.
If the Multiplayer Assignment button is not available, check the project's multiplayer configuration. Show Assignments UI must be selected.
Manual role assignment
- Click + Add World. A world is a set of roles that comprise a complete group or team of participants for the game.
- Drag-and-drop the users from the list on the left to the world roles on the right.

Automatic role assignment
To have Epicenter randomly assign your users to roles, click Auto Assign Worlds. Worlds are created automatically.
If a role requires a specific number of assigned participants, set the Auto-Assign Objective for the role.
Run configurations
A run configuration is a saved set of user-role assignments within a workshop.
You can choose to scope your worlds to run configurations if run configurations are enabled in your application.
Your workshop is done in several phases. You do a set of runs one day. When you come back to the workshop, you might have a slightly different group of participants. So you create new world assignments for a new set of runs.
The advantage of this approach is that you can store run-related data for the configurations. For example, you can compare run results across configurations.
To scope your worlds to a run configuration:
- On the Multiplayer Assignments page, expand the Select Scope panel.
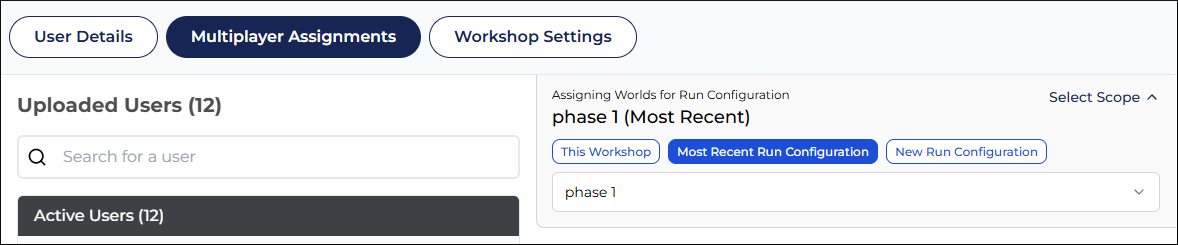
- Use the most recent configuration, or click New Run Configuration.
Run configurations are implemented in the JS libraries as Episodes.
Remove users
To remove users:
- Select users in the list.
- Click Remove Selected User(s) from Workshop.
This removes the user from the workshop, but does not delete the user from your organization.
Workshop settings
To edit workshop settings:
- From the Workshops page, open a workshop for editing.
- At the top, click Workshop Settings button.

Delete workshops
To delete a workshop:
- Open the Workshops page of your project in Epicenter.
- Select the workshop.
- Click Delete Selected Workshop(s) under the search box.

- Optionally, check the Permanently delete all users... box. Application users are managed at the organization level. Any users not deleted in this step remain in the org.
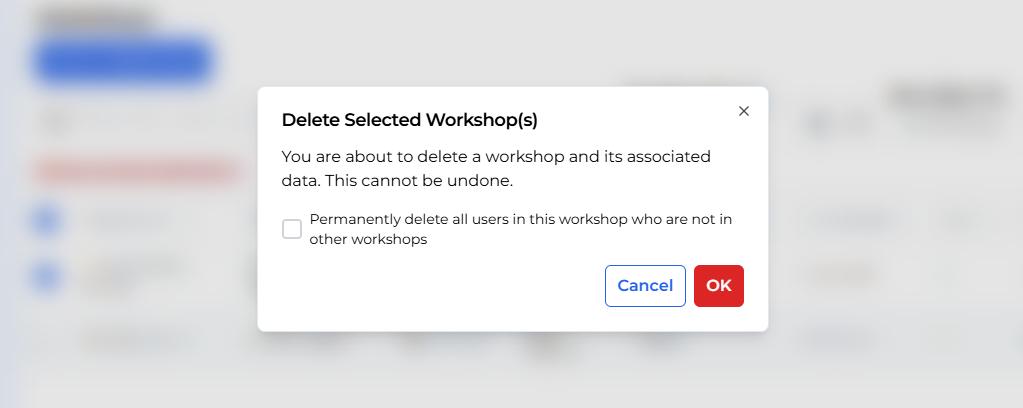
- Click OK.
To learn how to delete users, read Delete users.